1: What is .Mod and .Tod video?
2: How to convert .Mod and .Tod video to AVI, MPG, WMV, MPEG?
Answer:
1: .Mod and .Tod videos are mainly produced by digital harddisk camcorder such as JVC camcorder and so on. It is not common video formats and can only be played on some special players.
2: Now there is one professional Mod Converter that can convert .Mod and .Tod video to AVI, MPG, WMV, MPEG now. Aiseesoft Mod Video Converter has super conversion speed and excellent image/sound quality.
The following is a step-by-step guide on how to handle the conversion.
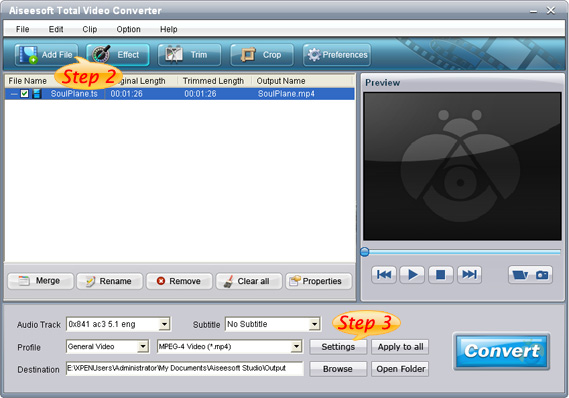
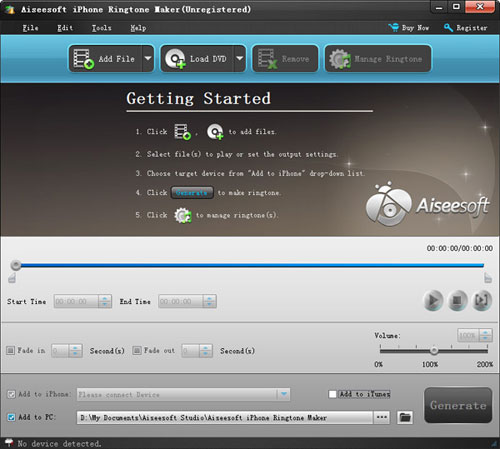
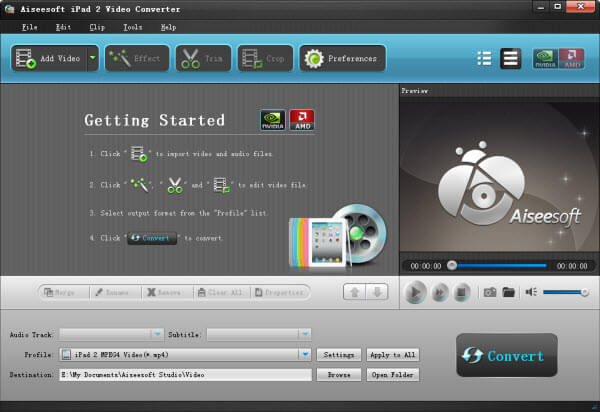
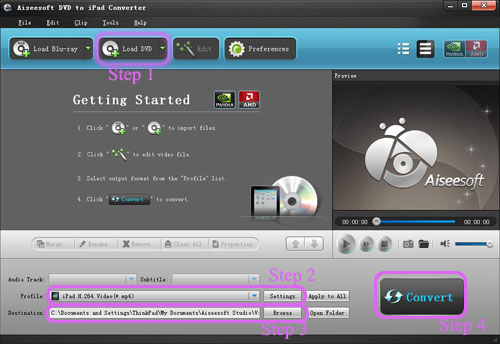
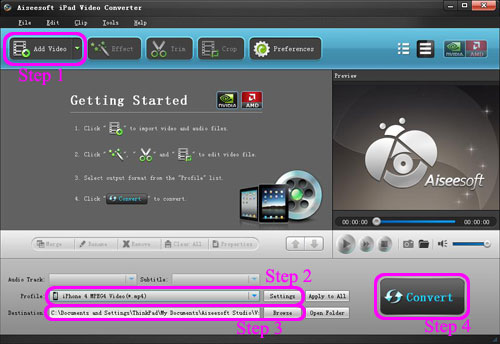
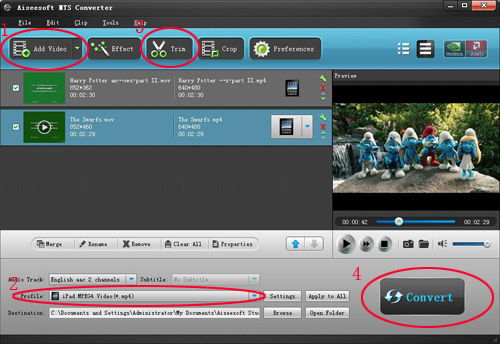
Step 0: Install and run Aiseesoft Mod Video Converter.
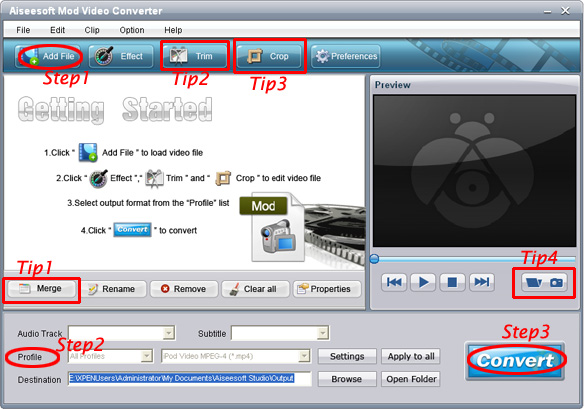
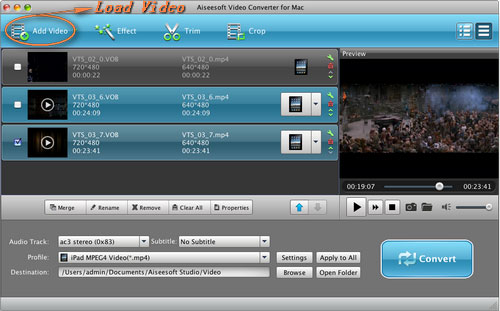
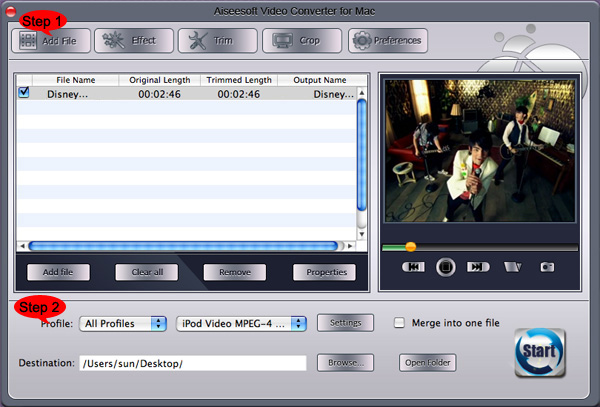
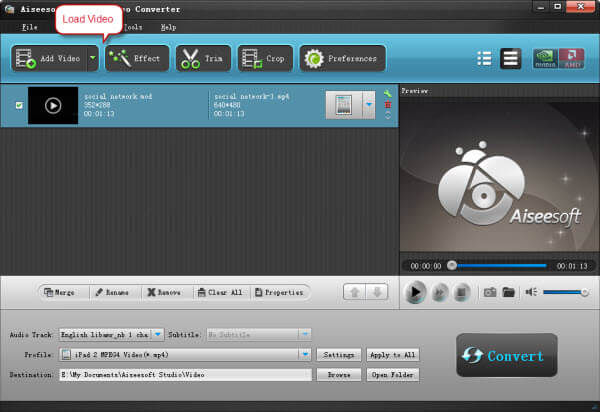
Step 1: Add files
Click “Add File” to add your video files.
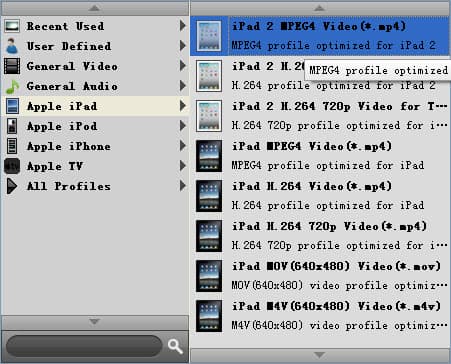
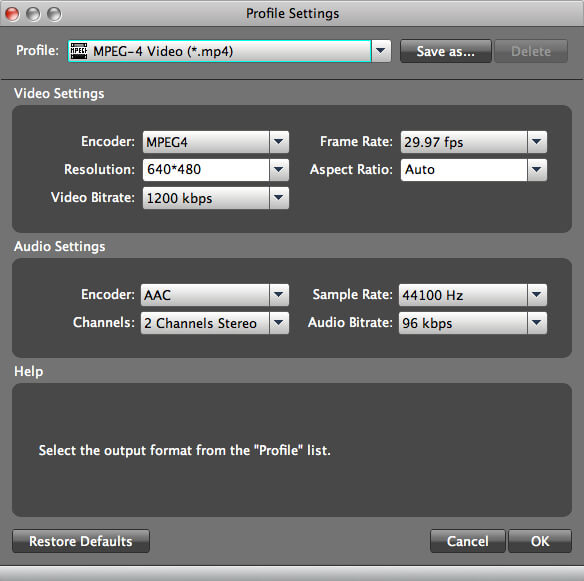
Step 2: Set output video format
Click “Profile” button from the drop-down list to select the output video format such as AVI, MPG, MPEG and WMV. You can click the “Settings” button to set parameters of your output video such as Frame Rate, Bitrate to get the best video quality as you want.
Step 3: Click the “Start” button to start the conversion.
Tips:
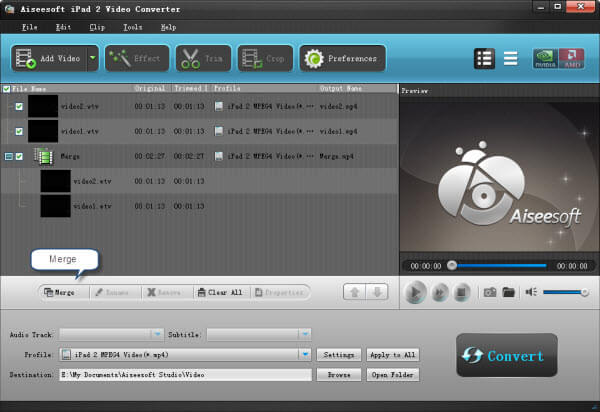
1: How to join your Mod/Tod videos
If you want to merge several Mod/Tod videos into one file you can choose them and click the “Merge into one file” to do it.
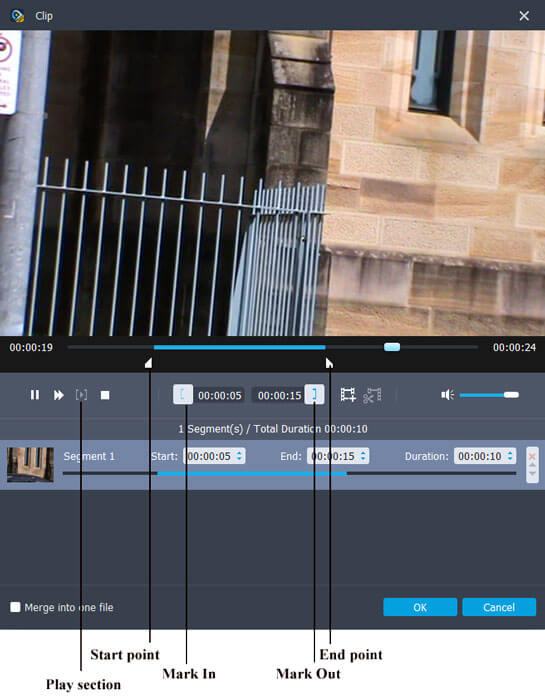
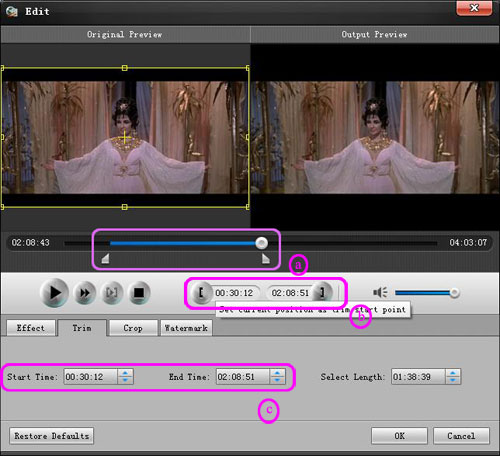
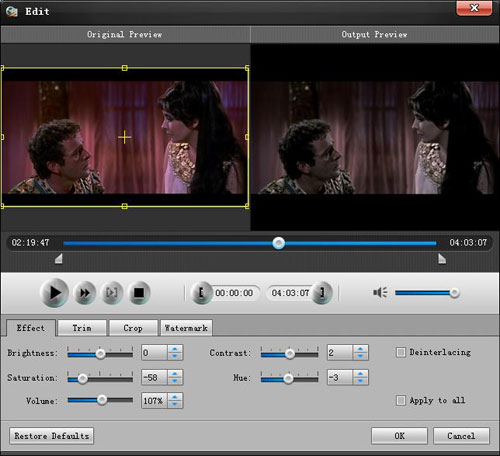
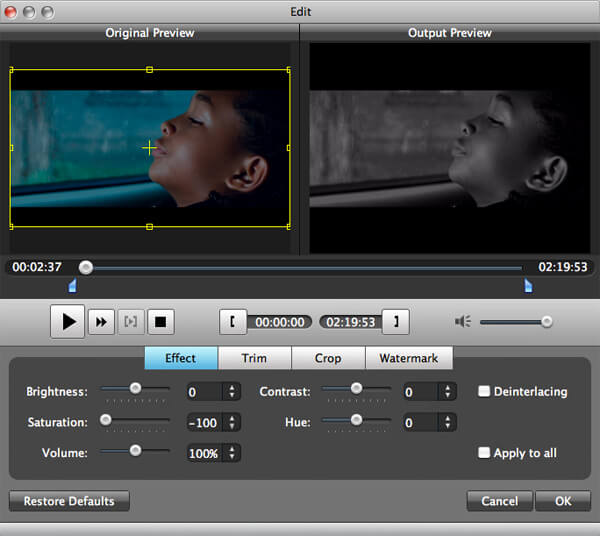
2: How to split your Mod/Tod video
The “Trim” function also servers as a video splitter. You can set the “Start Time” and “End Time” to set the time of the clip or you can directly drag the slide bar to the accurate position. After cutting your Mod/Tod videos into small clips you can upload them to YouTube, Myspace and so on to share your video with people of the world.
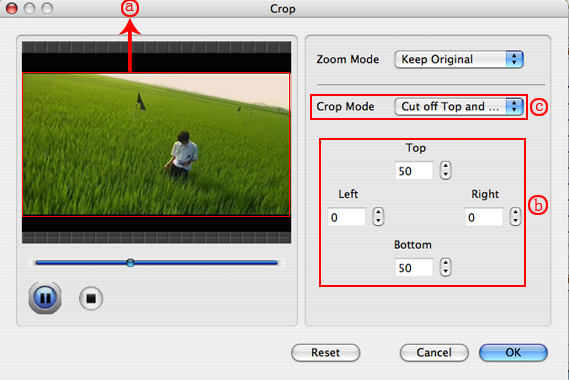
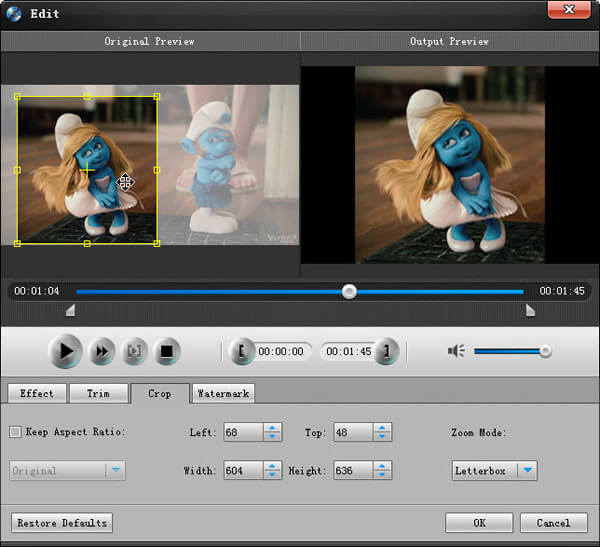
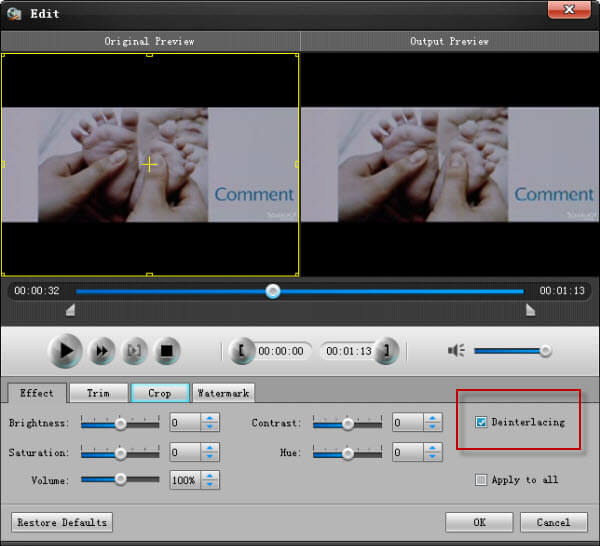
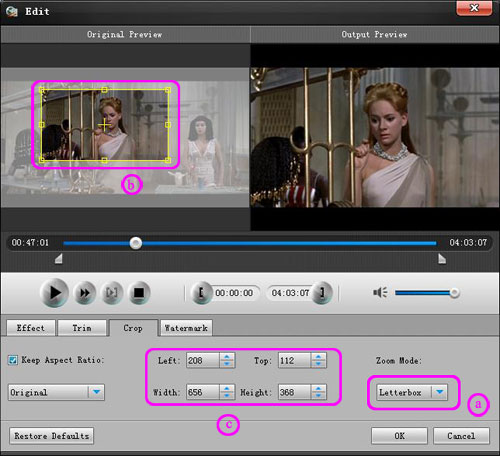
3: How to crop your Mod/Tod video size
By using the “Crop” function you can crop the black edge of your video and you can also drag the line around the video image to adjust your video to your mobile devices. With it you can enjoy and share your DV with other people anytime and anywhere.
4: How to save your favorite picture
If you like the current image of the video you can use the “Snapshot” option. Just click the “Snapshot” button the image will be saved and you can click the “Open” button next to “Snapshot” button to open your picture.